DIY
Valentine’s Day Card Ornament: A Quick & Gorgeous Crochet Gift

Welcome to the Valentine’s Card Ornament pattern!
Valentine’s Day is just around the corner, and if you’re anything like me, your schedule is probably packed.
Between daily tasks, work, and keeping everything running, finding time for elaborate crafting can be a challenge. But we all want to give something that carries that personal touch, right?
That’s how this Valentine’s Card Border was born!
It’s a quick, "finished-between-tasks" project that results in a gorgeous handmade ornament. Whether you hang it on a decorative branch or use it as a unique gift
topper, it adds that touch of handmade luxury we all love.
The best part? This isn't just for Valentine’s Day!
While a classic Valentine’s card looks stunning with this crochet border, you can use this technique for almost any occasion:
- Wedding Keepsakes: Transform a beautiful wedding card into a lasting ornament for the couple.
- Baby’s First Memories: Use a birth announcement card to create a precious nursery decoration.
- Christmas Decor: Upcycle your favorite festive cards into beautiful ornaments for your tree year after year.
- A Thoughtful Gift: You can even buy a brand-new, luxury greeting card and crochet around it to turn a simple card into a "finished," handmade gift that feels much more expensive than a standard envelope.
If you’re feeling protective of an original keepsake, you can simply take a high-quality photo or a color scan and print it out. This way, you create a gorgeous
ornament while keeping the original card tucked away safely. Whether you use the original, a new card, or a copy, this project is all about giving those cherished moments a place of honor in your home.
Easy Crochet Ornament Pattern
Everyone loves a quick crochet project—they are fun, relaxing, and ideal for a little "me-time" between chores. Plus, they use very little yarn, making them perfect for busting your stash! This pattern uses a simple technique to crochet directly around a ring, giving the border a beautiful, sturdy look. In my home, you can never have enough personal accents, and these ornaments are so addictive to make that you’ll likely start a whole collection!
The Perfect Yarn for Your Keepsake
When it comes to decor, stitch definition is key. For this project, I recommend a cotton yarn. It’s soft yet durable, which is exactly what you need for an item you want to treasure. I used Scheepjes Catona for this one, but any cotton yarn will do. Choose colors that complement the card you are using for a harmonious and high-end result.
Skill level
Easy – Written in standard US terms.
Materials Needed
- A beautiful card: Pick one with a design you love.
- A metal ring: I used an old bracelet! Anything sturdy and circular works.
- Yarn: A small amount of leftover yarn. I used Scheepjes Catona.
- Crochet hook: Adapted to your yarn weight. I used a 2.5mm hook.
- Tools: Scissors, pencil, hot glue, and a tapestry needle.
Abbreviations
- ch – Chain
- dc – Double Crochet
- sc – Single Crochet
- sl st – Slip Stitch
- st(s) – Stitch(es)
- rep – Repeat
- ** – Repeat instructions between asterisks
Step-by-Step Instructions
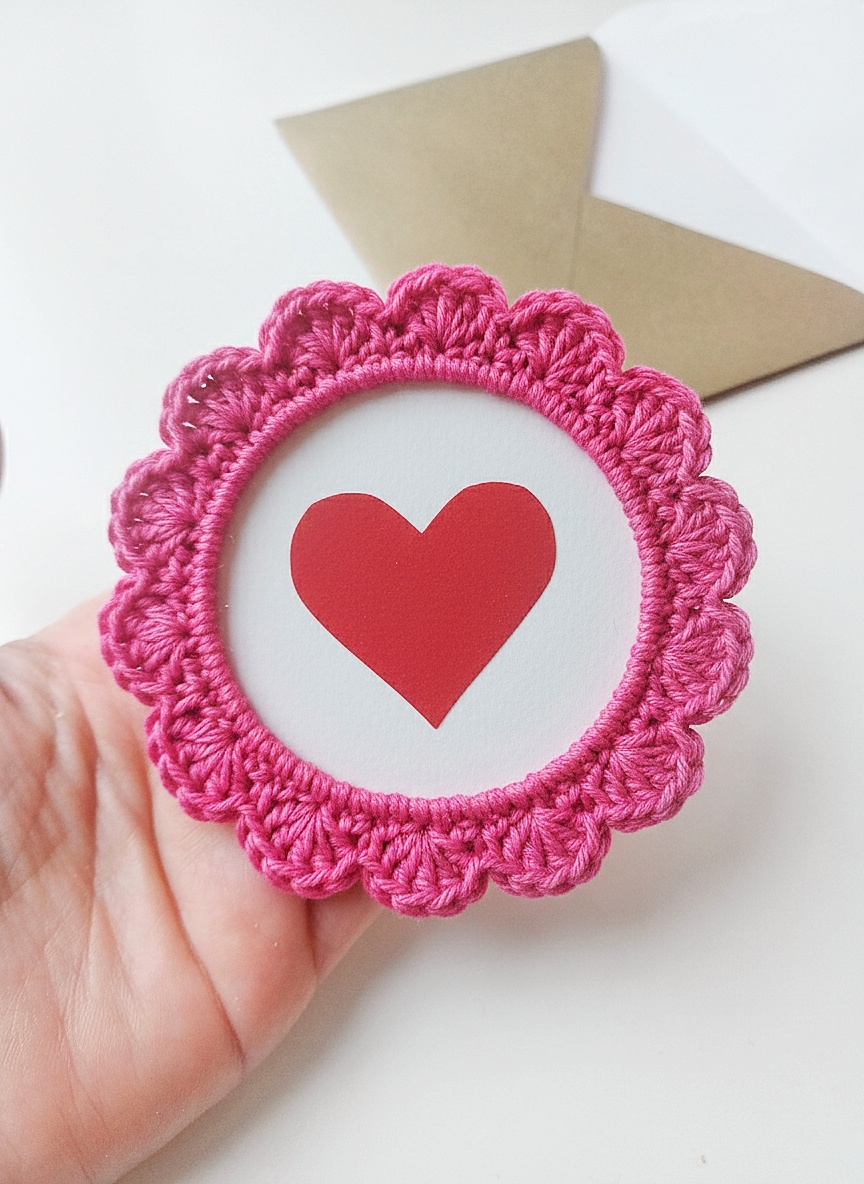
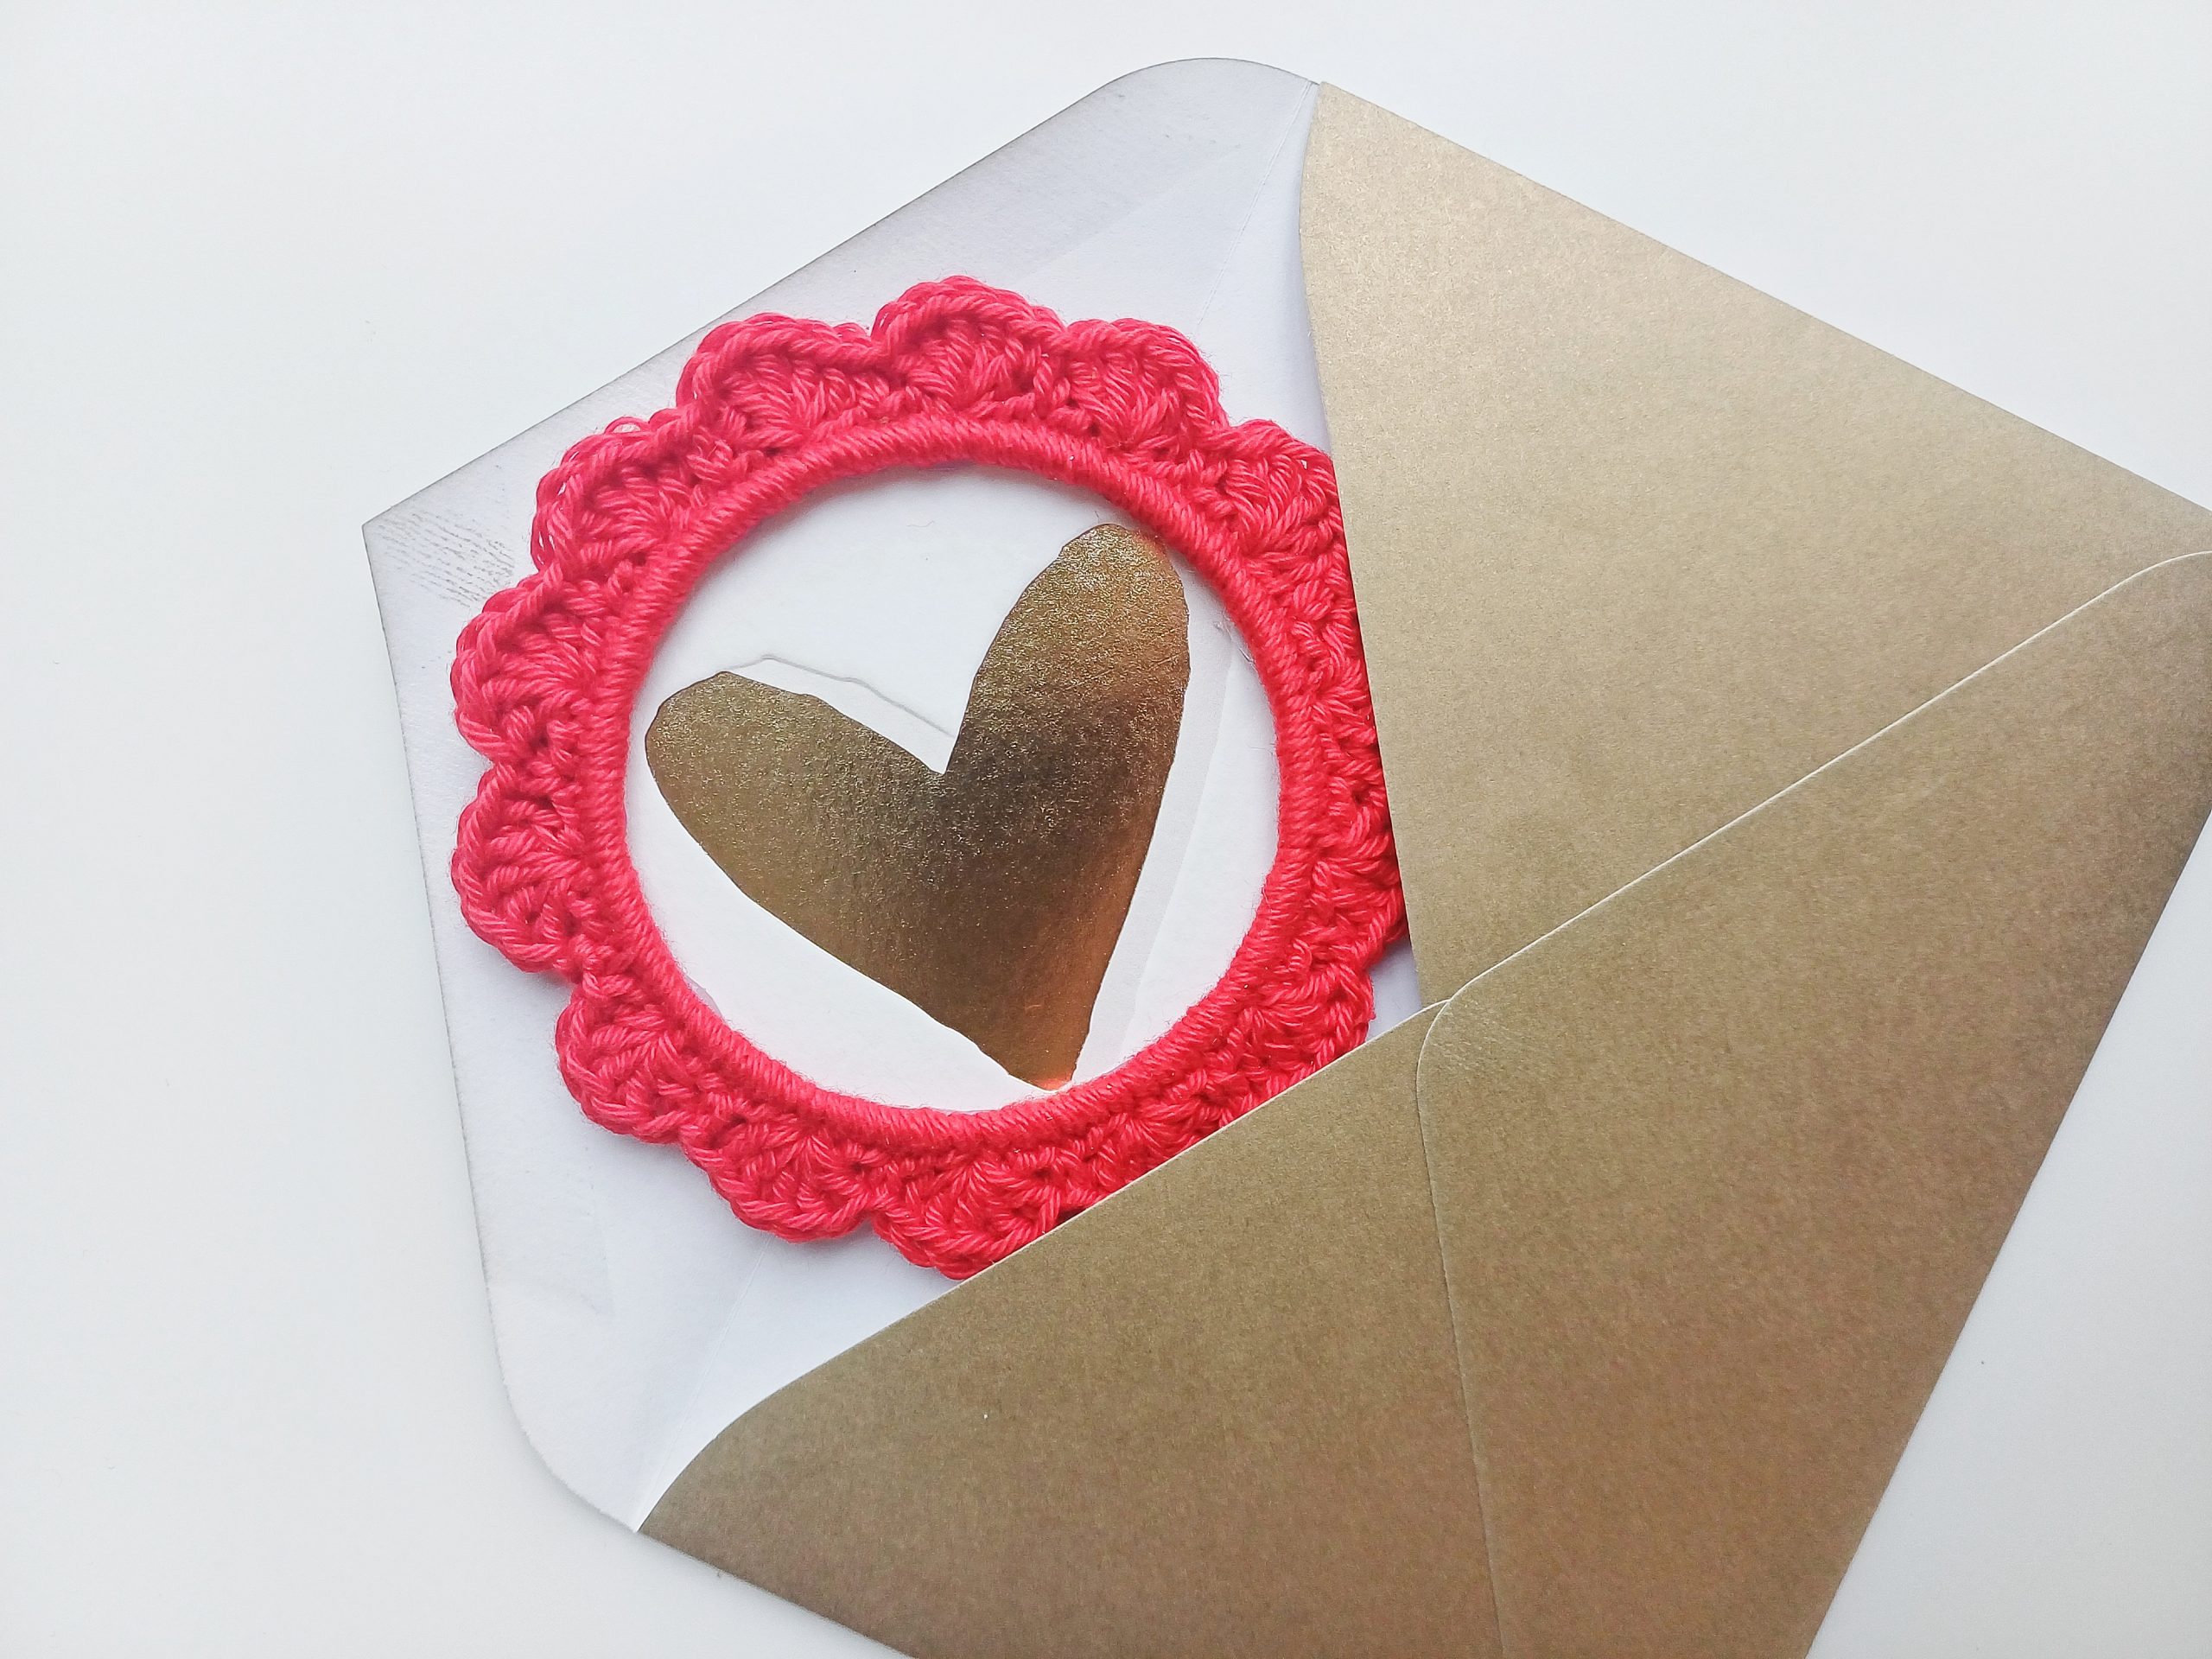
Step 1: Preparing Your Image
Place your metal ring over the card and find the perfect crop. Use your pencil to trace around the outside of the ring, then carefully cut out your circle. This will
be the "soul" of your ornament!

Step 2: Crocheting Around the Ring
Now, let’s add that beautiful crochet border. We’re working directly onto the metal ring to give it that sturdy feel.
- Round 1: Start with a slip knot on your hook. Work single crochets (sc) all the way around the ring. You need a multiple of 6 stitches to make the pattern work perfectly. You don’t have to calculate, just count to 6 and repeat until you covered the entire ring. Join with a slip stitch (sl st) to the first sc.
- Round 2: Skip one stitch. *Work 5 double crochets (dc) into the next stitch to create a shell. Skip two stitches, work 1 single crochet (sc), and skip another two stitches.*
- Repeat from * to * all the way around. End with a sc.
Weave in your ends.
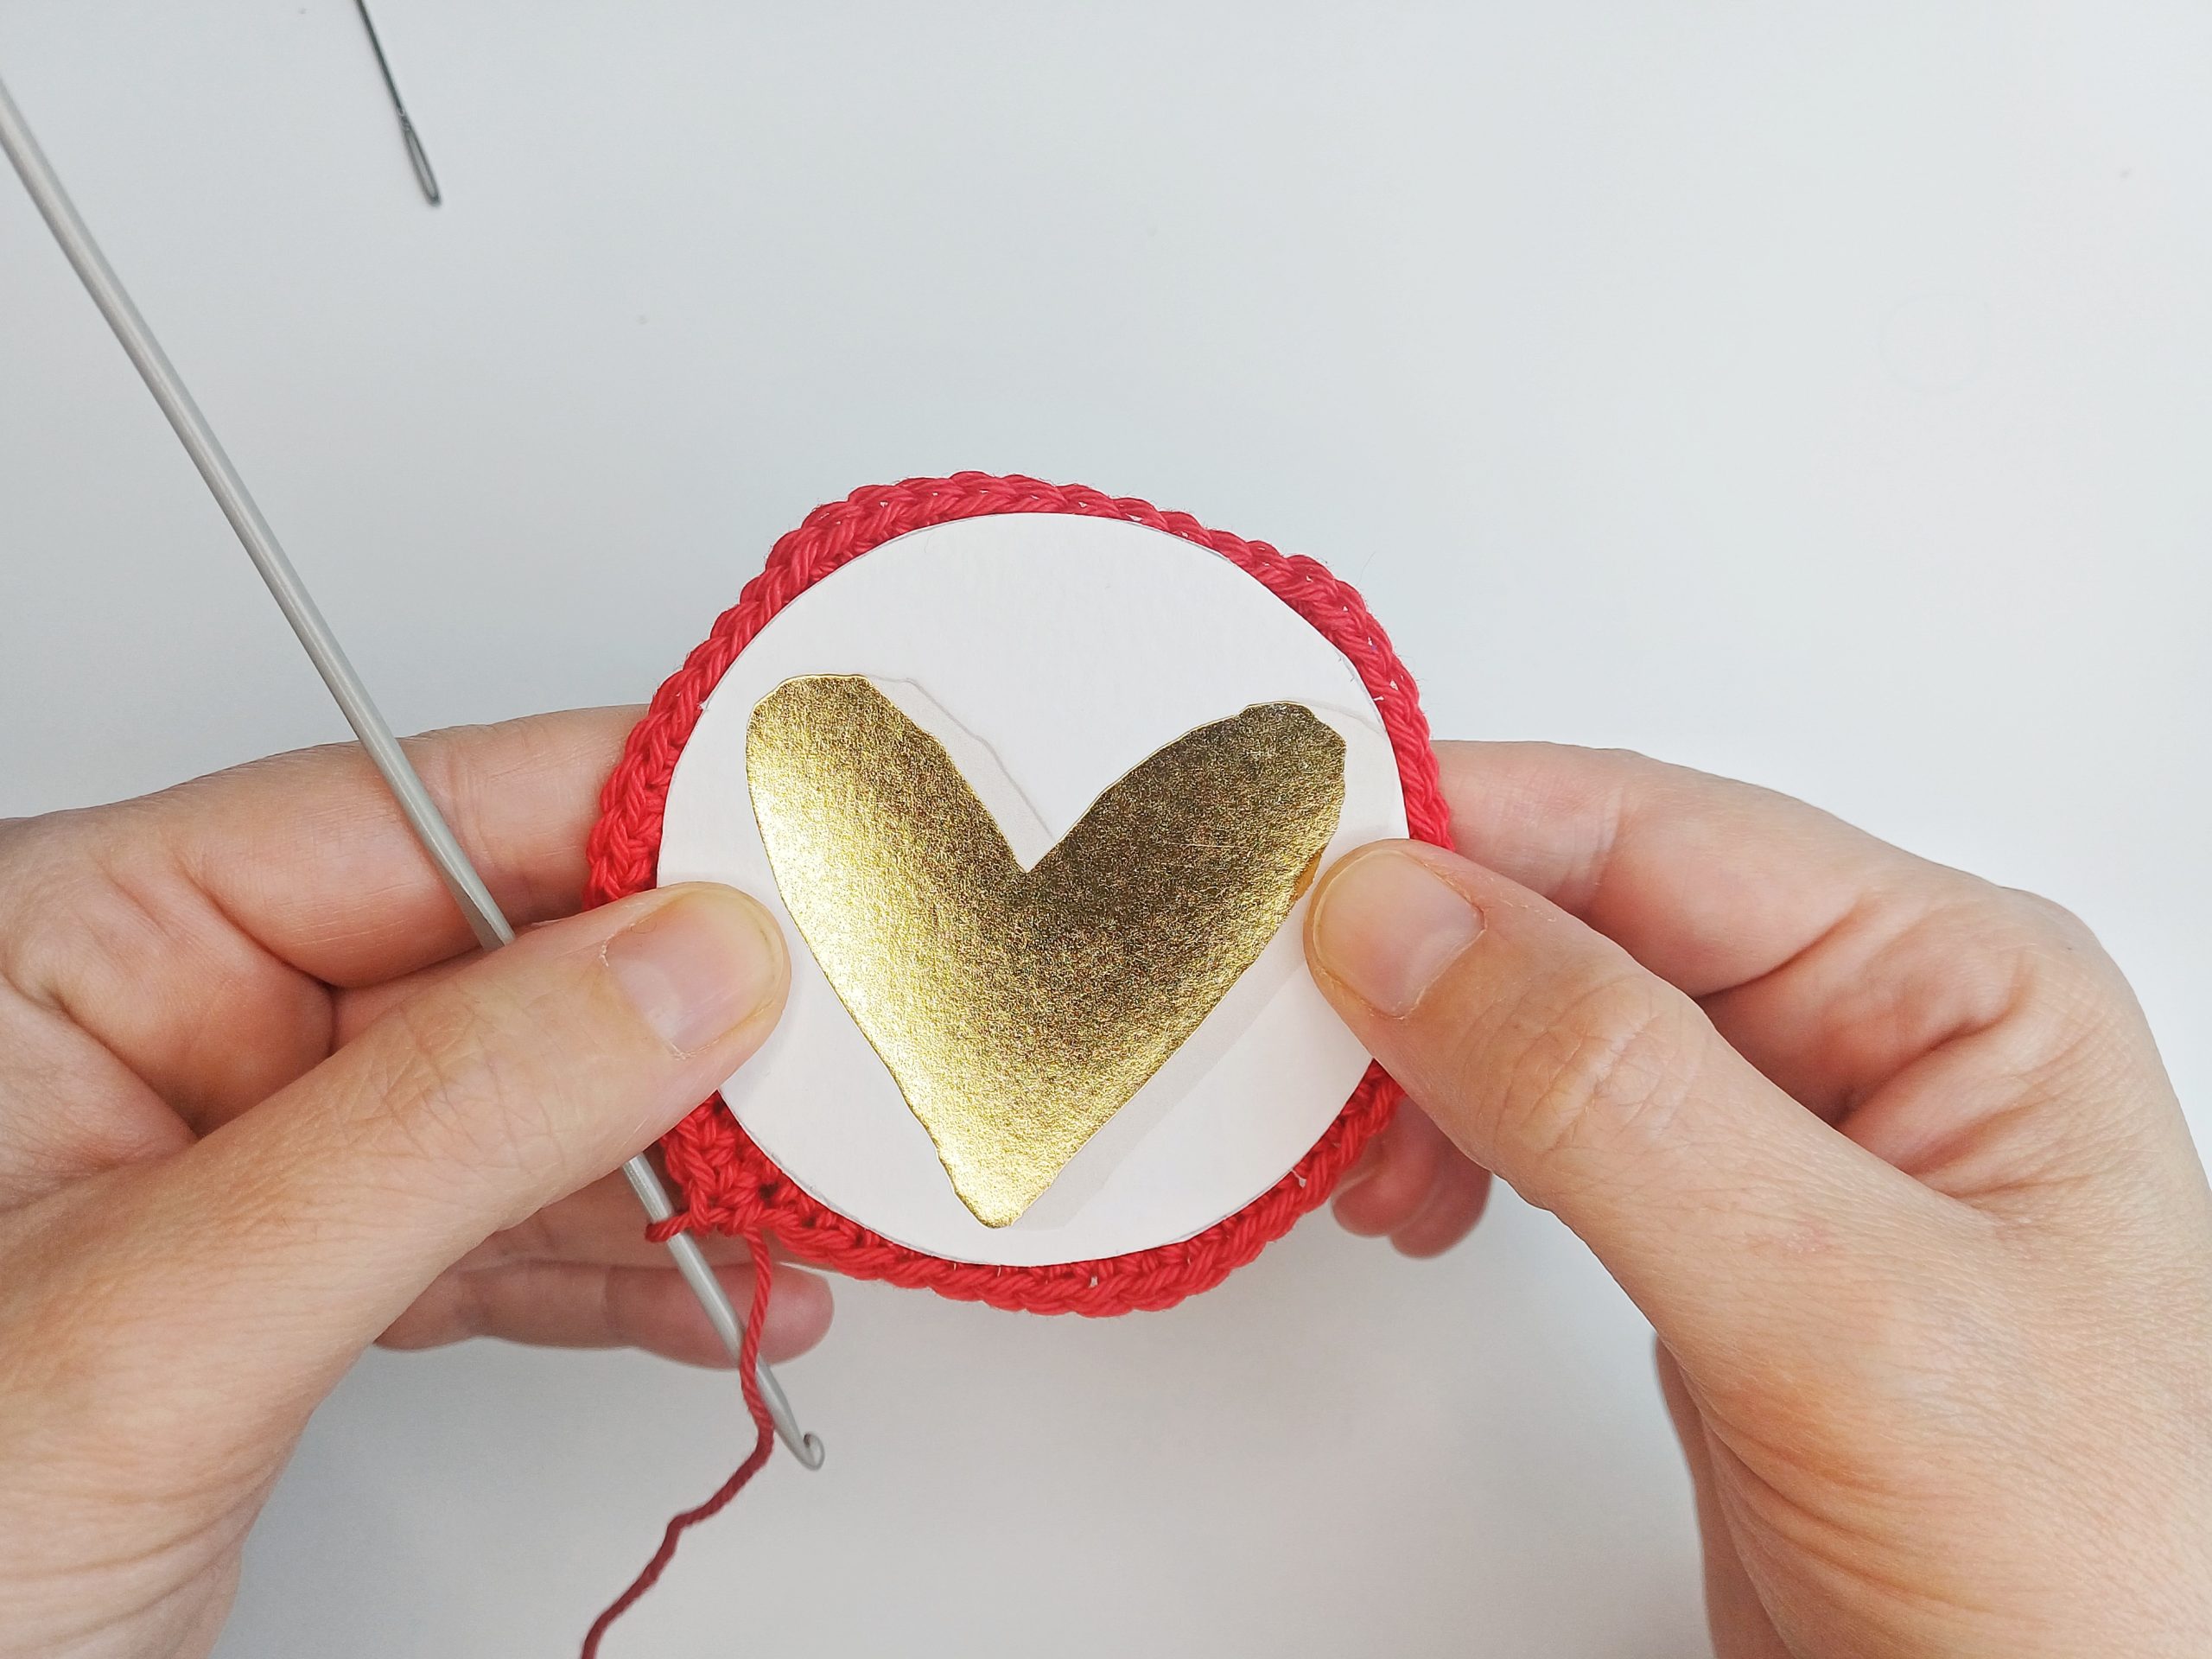
Step 3: Assembly
Use your hot glue gun to carefully attach the back of the crocheted ring onto your cut-out card circle. The crochet border now frames your image perfectly!
Step 4: Making the Backing
To make this look like a finished, high-quality product, we’re going to crochet a simple back piece. This covers the back of the card and makes the ornament feel
substantial.
- Make a Magic Ring.
- Round 1: 6 sc into the ring. Pull the tail tight to close. (6 sts)
- Round 2: Work 2 sc in each stitch around. (12 sts)
- Round 3: (1 sc, 2 sc in the next st) repeat around. (18 sts)
- Round 4: (1 sc in the next 2 sts, 2 sc in the next st) repeat around. (24 sts)
- Round 5: (1 sc in the next 3 sts, 2 sc in the next st) repeat around. (30 sts)
- Round 6: (4 sc, 2 sc in the next st) repeat around. (36 sts)
Keep going for as long as needed to reach the size to hide your card! Simply add one more regular sc between the increases for each round (e.g., Round 7: 5 sc then an increase).
Cut the yarn but leave a long tail to sew the front to the back. Pull through the yarn.
Sew a fake stitch.
Weave in ends.
Step 5: Finishing Touches
Place the crocheted backing against the back of your card and sew it to the front crochet border using your tapestry needle.
And you’re done!
A beautiful, handmade Valentine’s gift that didn't take hours but looks like it came from a high-end boutique.
I would love to see your creations! Tag me in your photos on Instagram or Facebook and show me which cards you decided to treasure forever.
Pattern Terms & Conditions
Personal Use Only
This pattern is provided for personal use. You are welcome to make as many of these ornaments as you like for yourself, your friends, and your family. Sharing the
joy of handmade gifts is what crafting is all about!
Copyright Notice
The instructions, layout, and images associated with this pattern are the intellectual property of Miza Vanila. Please do not redistribute, sell, or copy the written pattern in part or in whole.
Selling Finished Items
You have my permission to sell finished ornaments made from this pattern on a small scale (e.g., at local craft fairs or in your small boutique). I only ask that you credit Miza Vanila as the designer. It’s a wonderful way to support the maker community!